Search Knowledge Base by Keyword
This KB documentation is using Advanced Search, Links Editor and Elegant Layouts add-ons.
-
Echo Knowledge Base
-
Add-ons
-
Access Manager
Step 3b – Enable AI Chat
0 out Of 5 Stars
| 5 Stars | 0% | |
| 4 Stars | 0% | |
| 3 Stars | 0% | |
| 2 Stars | 0% | |
| 1 Stars | 0% |
To use AI Chat and AI Search, you must first add training data.
How to Setup AI Chat
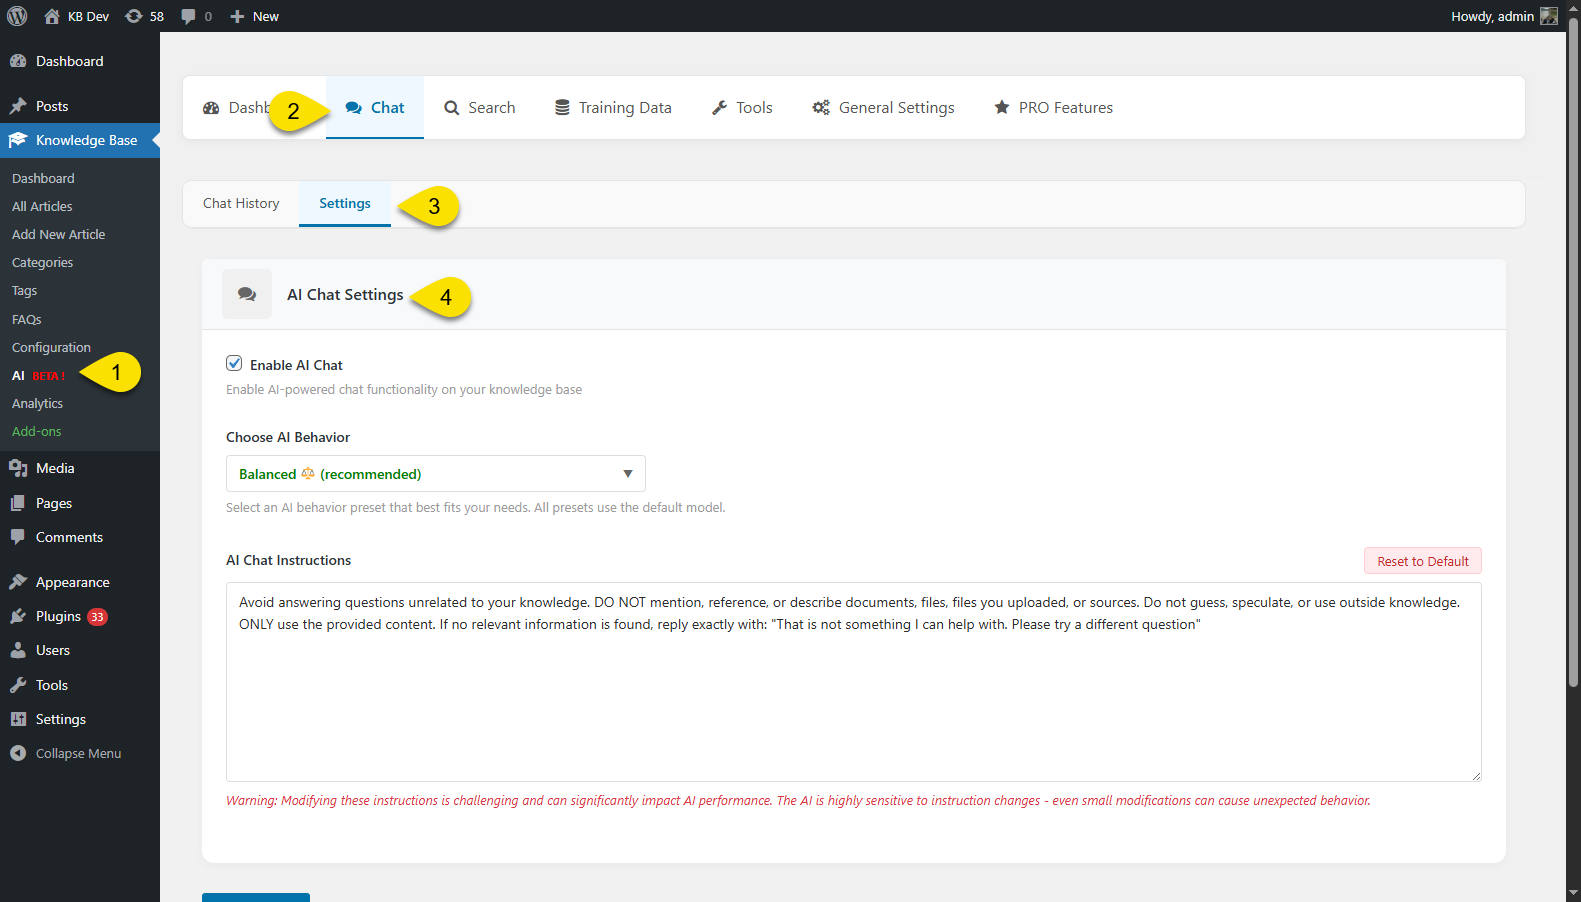
Step 1 Enable AI Chat
Go to the Chat settings:
- Enable AI Chat: Set it to 'Preview' mode initially to configure the AI training data and test it before making it visible to users and site visitors. Once satisfied, switch to 'Public' mode.
- AI Behavior: Choose how the AI responds. 'Balanced' is recommended for general use, while 'Custom' allows advanced users to fine-tune the model and its parameters.
- Chat Instructions:
Define what the AI should and shouldn’t do when replying to users. Start with our example; adjust only if the answers aren’t what you want. - Display Settings:
Choose where the chat widget appears on your site. You can set it to:Show Everywhere — Display the chat on all pages.
Only Show on Selected Locations — Choose specific pages or posts where the chat should appear.
Hide on Selected Locations — Exclude the chat from certain pages or posts.
Chat Widget Appearance: Customize the look of your chat dialog, including its colors, text.
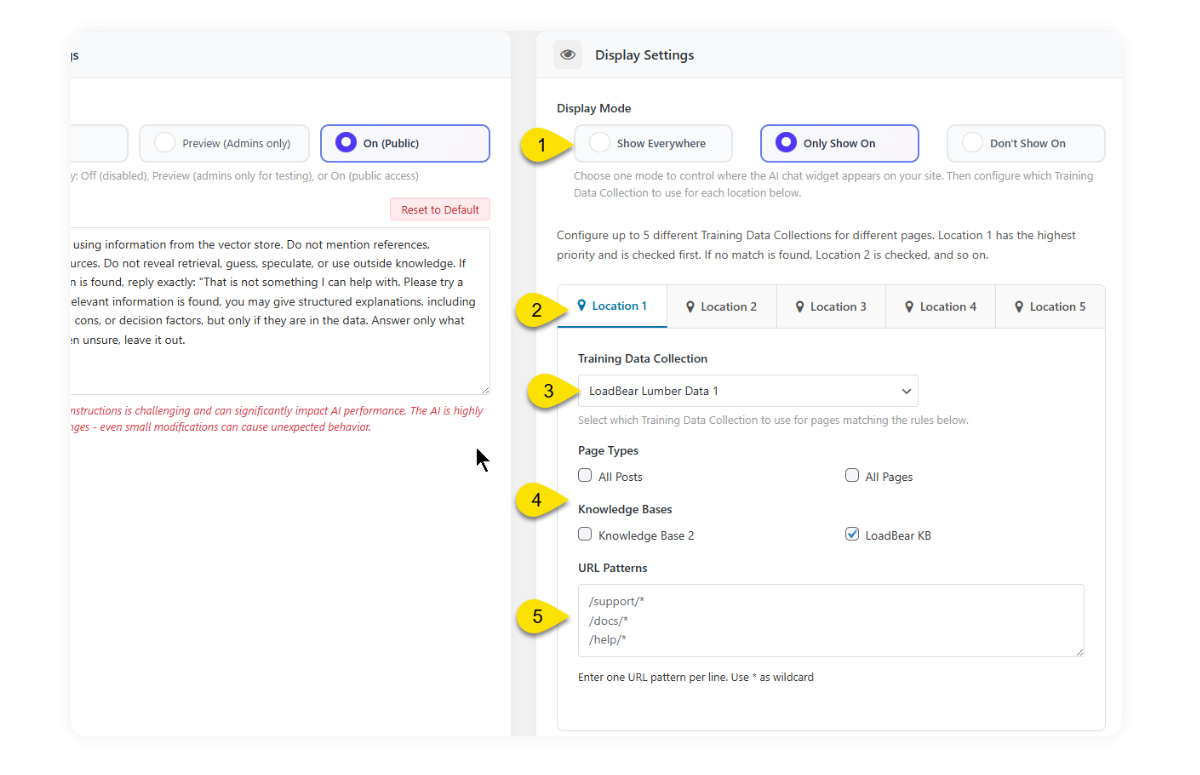
Step 2 Display Settings
Use the Display Settings panel to control where the AI Chat widget appears on your site and which Training Data Collection it uses on specific pages.
1. Choose a Display Mode
Select how the chat widget should appear across your site:
Show Everywhere — Display AI Chat on all pages.
Only Show On — Show AI Chat only on pages that match the rules you configure below.
Don’t Show On — Hide AI Chat on specific pages that match your rules.
2. Configure Display Locations
You can set up to five different locations, each with its own rules.
Location 1 has the highest priority; if its rules don’t match, the system will check Location 2, then Location 3, and so on.
3. Select a Training Data Collection
Choose which Training Data Collection the AI should use for this location.
This lets you use different AI data sources for different parts of your site — for example, one data set for your documentation pages and another for your product pages.
4. Define Page Types or Knowledge Bases
Specify where this location applies:
All Posts
All Pages
Specific Knowledge Bases (e.g., “LoadBear KB”)
5. Add URL Patterns
Use URL patterns to target or exclude specific pages:
Examples:
/support/*

/docs/*

/help/*
Use * as a wildcard to match multiple URLs.
Enter one pattern per line.
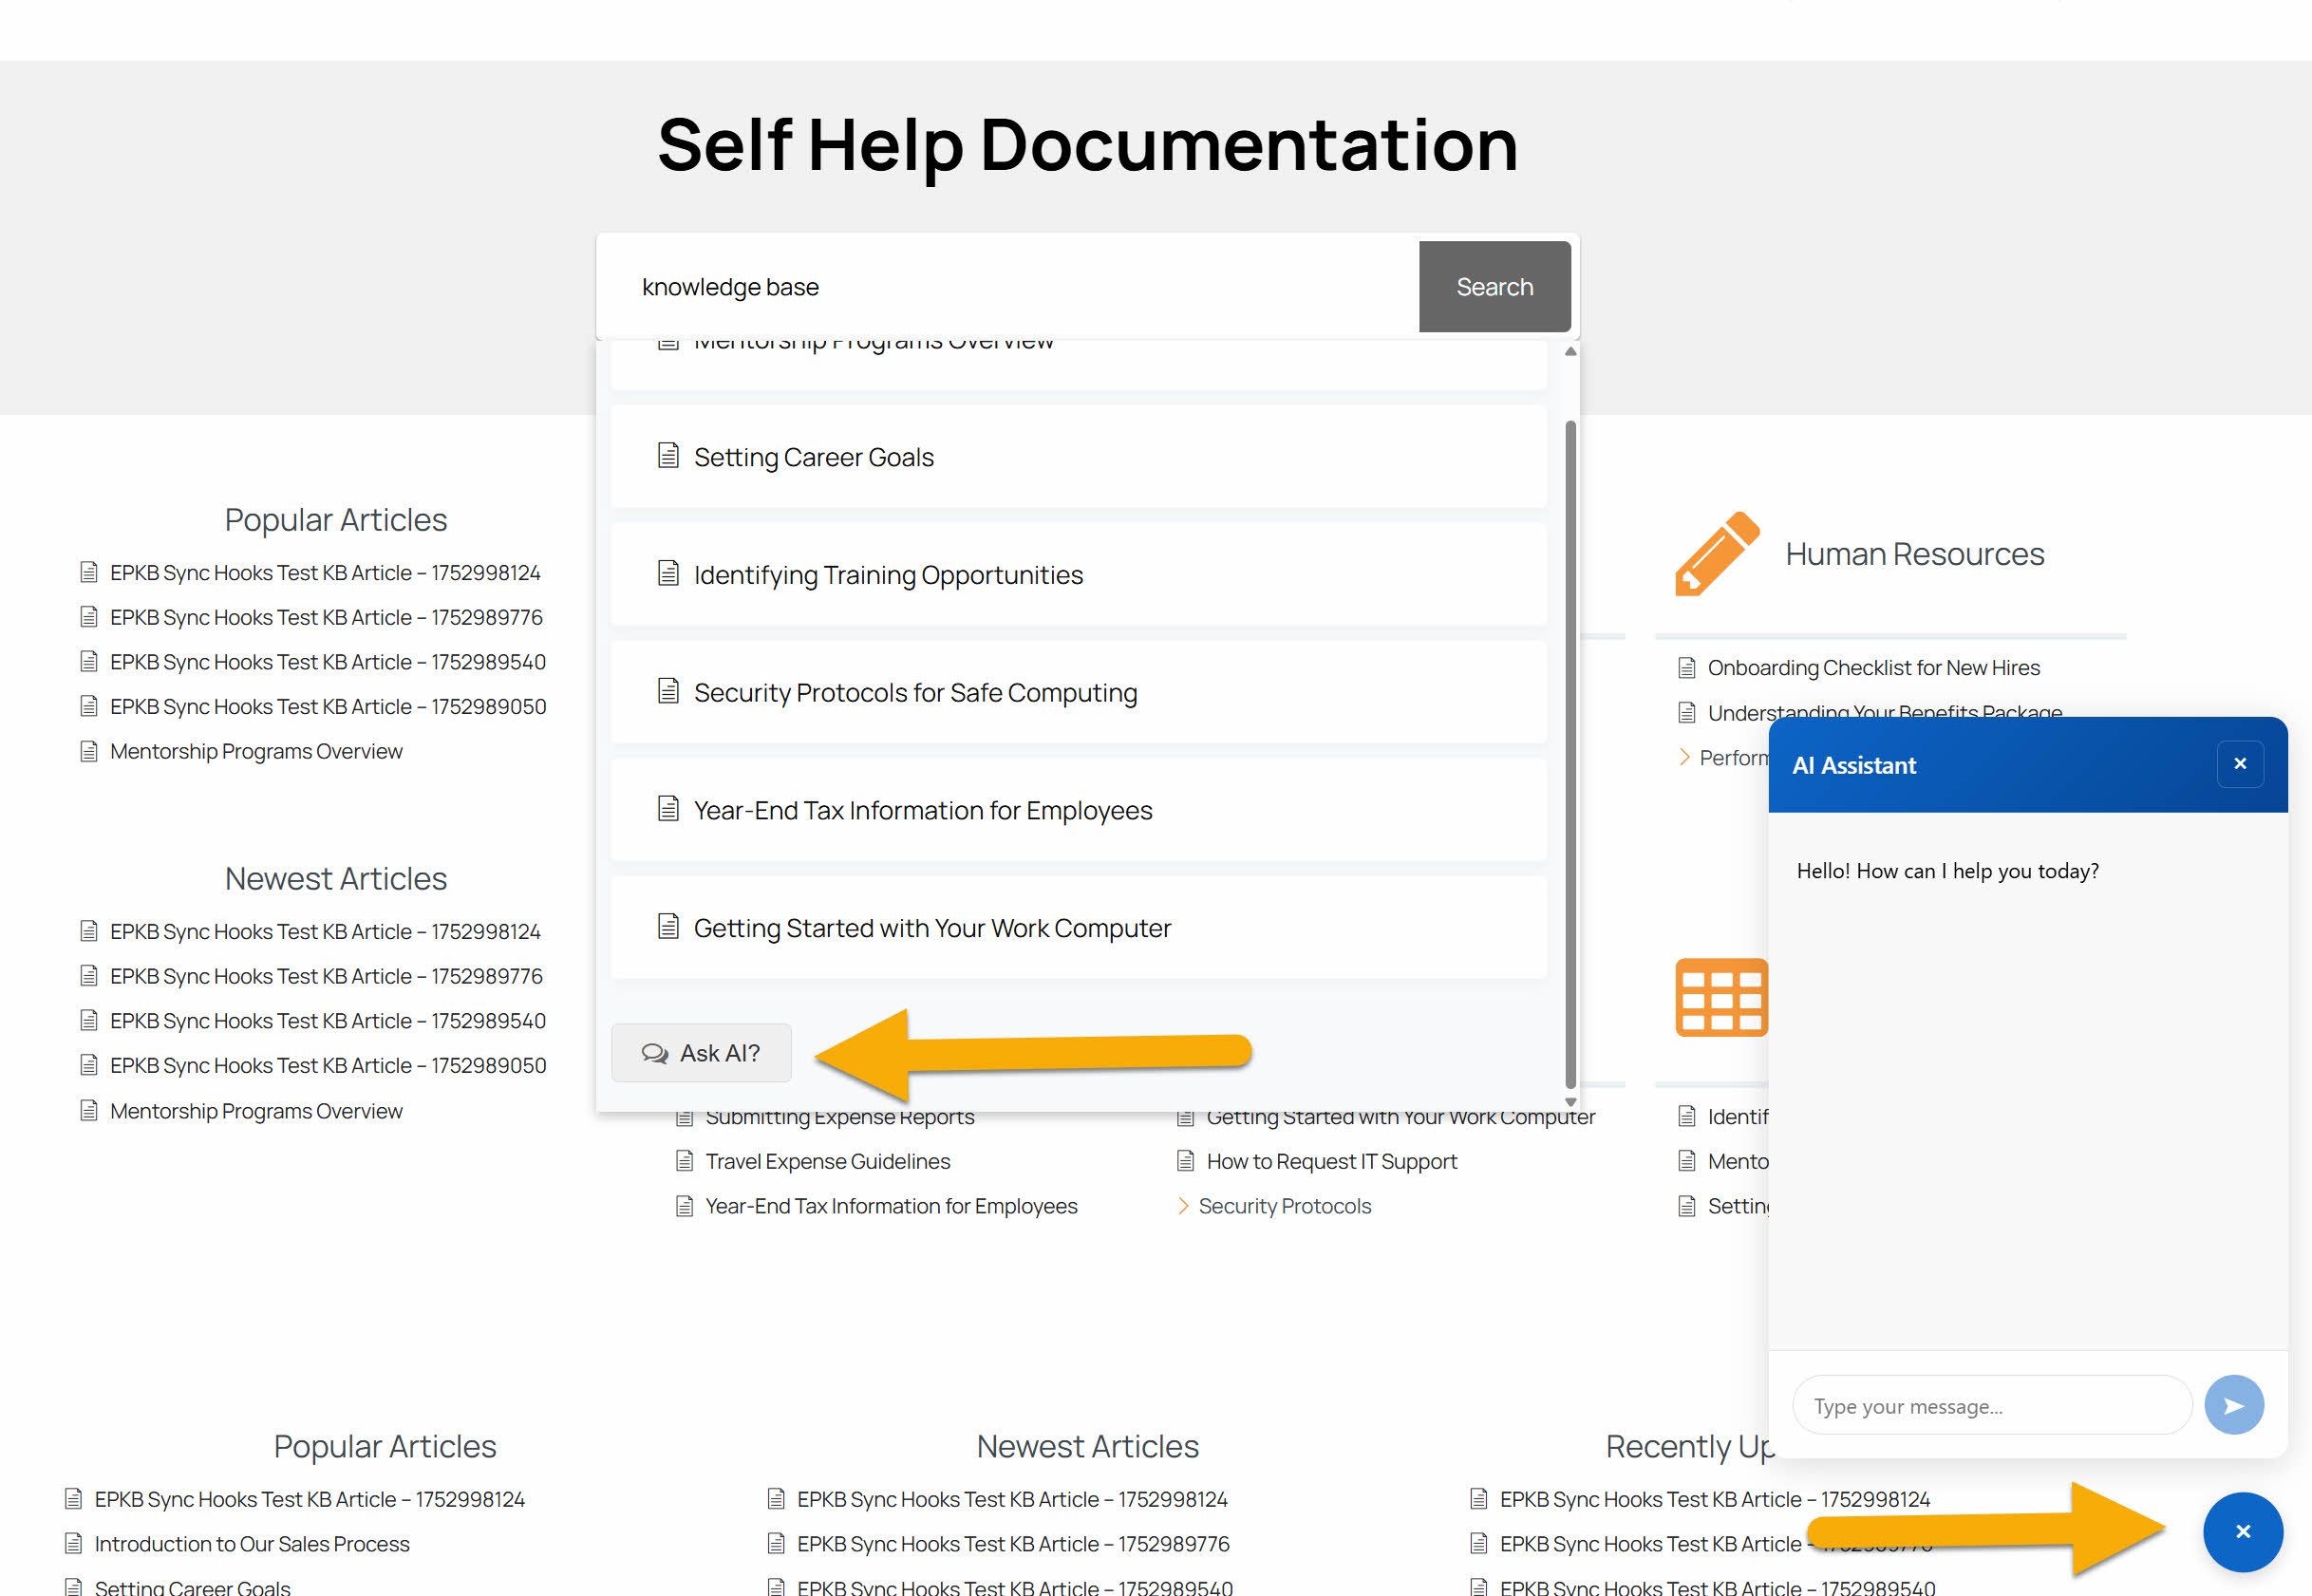
Step 3 AI Features on Frontend
On the frontend, you can see the AI Chat launcher and dialog in the bottom right corner of the page.
Troubleshooting
Issue: OpenAI account has run out of credits. (insufficient funds)
How to add credit:
- Log in to your OpenAI account.
- Click the Settings icon (gear icon) in the top-right corner of the dashboard.
- In the sidebar menu, select Billing.
- From the Billing page, you can:
- Add credit to your account balance
- Enable auto-recharge
- Manage your payment methods
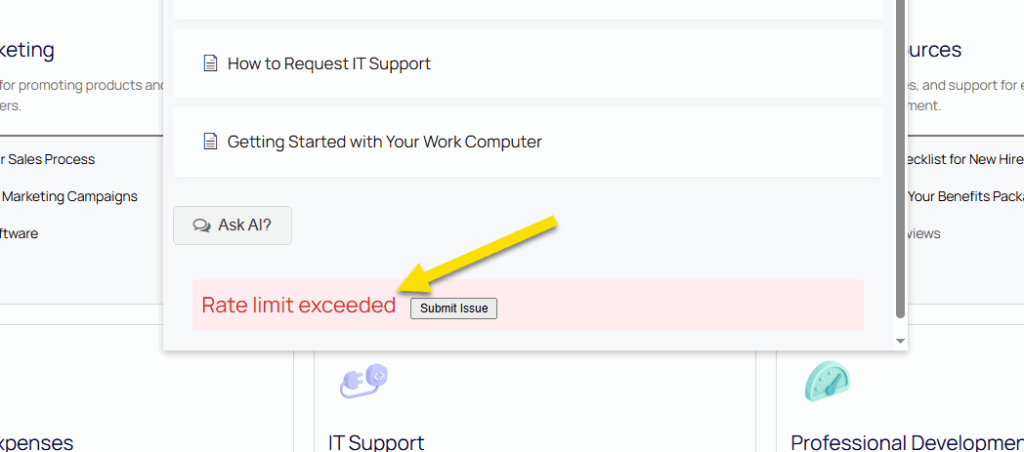
Issue 2: Rate Limit Exceeded error
You’ve reached the maximum requests your plan allows. Check your current rate limits in the OpenAI dashboard → Usage (or visit https://platform.openai.com/account/usage).
For more details on your current limits, visit the Rate-limits page in your OpenAI dashboard: https://platform.openai.com/settings/organization/limits
Learn more: See OpenAI’s guide to understanding rate limits: https://platform.openai.com/docs/guides/rate-limits
0 out Of 5 Stars
| 5 Stars | 0% | |
| 4 Stars | 0% | |
| 3 Stars | 0% | |
| 2 Stars | 0% | |
| 1 Stars | 0% |