-
Echo Knowledge Base
-
Add-ons
-
Access Manager
Placement of Top Features
0 out Of 5 Stars
| 5 Stars | 0% | |
| 4 Stars | 0% | |
| 3 Stars | 0% | |
| 2 Stars | 0% | |
| 1 Stars | 0% |
If you are upgrading from the previous KB version make sure you have this setting turned on first.
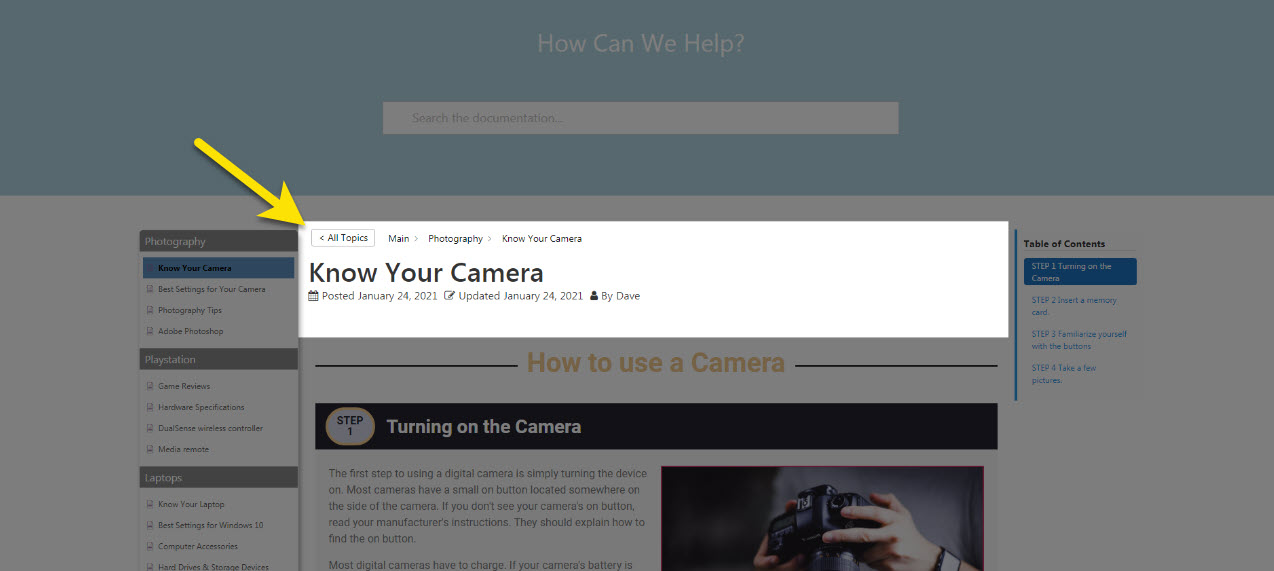
Edit the Top Area of Your Article
Control whether and how the following features are displayed at the top of your article:
- Article Title
- Back Navigation
- Breadcrumbs
- Posted Date
- Updated Date
- Author
- Print Button
Option 1 Top Article with Features to Configure
Control features in the following area:
Option 2 Set up Top Article Rows
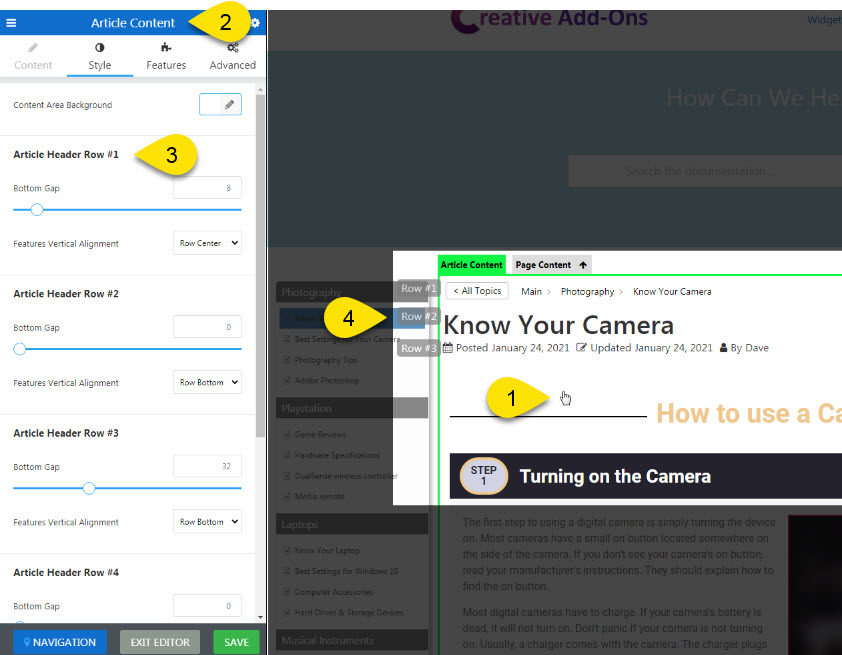
- Click on the article content area to load the section settings.
- The section Title should show "Article Content."
- The top of the article is composed of five rows. Each row has two settings that you can control:
- Bottom Gap - This is the space between this row and the row below it.
- Features Vertical Alignment within the row. If you have big font sizes, this will help align them better.
- Gray tags show rows that contain features. This area has up to five rows. Once you assign a feature into a row, the row will become visible.
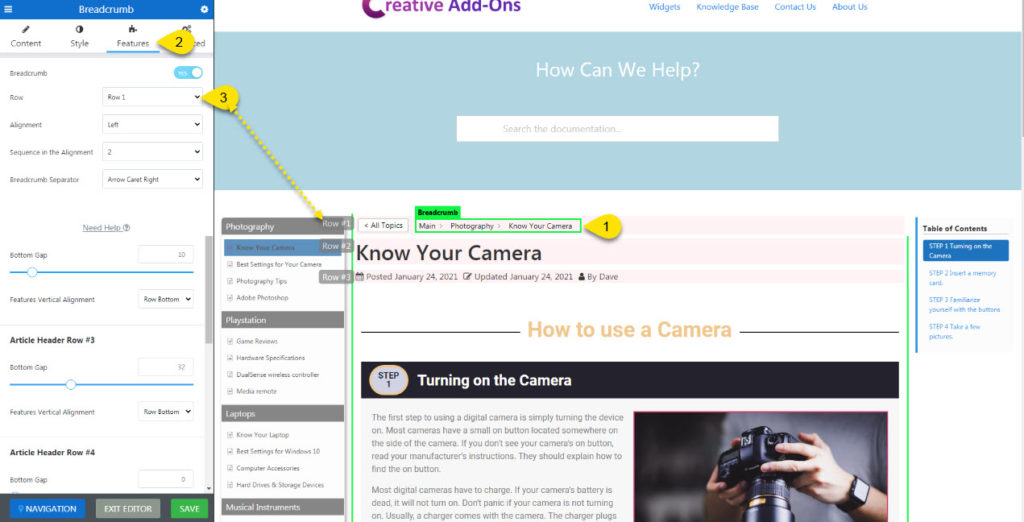
Option 3 Moving a Feature to a Different Row
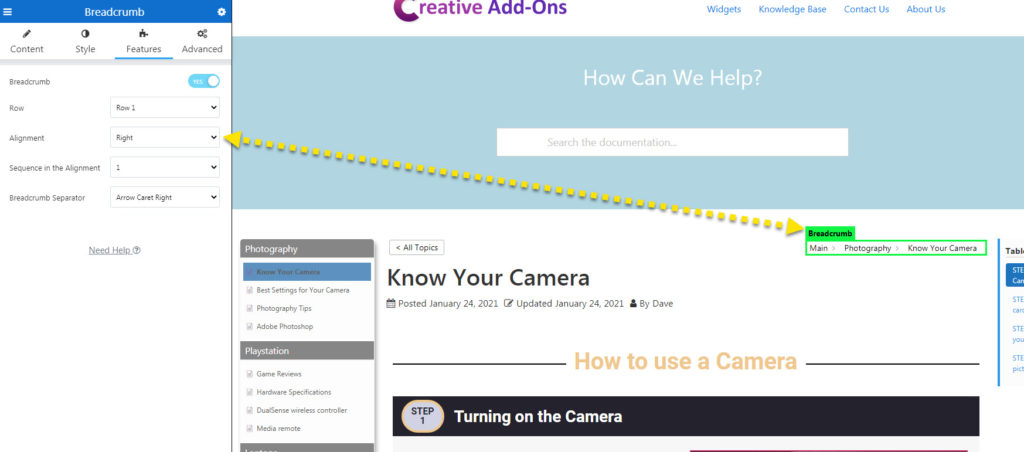
Click on the Feature that you would like to move. In this example we will target the breadcrumb feature.
- Click on the Feature you wish to move.
- Select the Features Tab in the Editor sidebar.
- Change the row in which the breadcrumb will appear.
In this example, if you choose Row 4 the breadcrumbs will be placed below the Posted Date, Updated Date, and Author. ( Row 3 ).
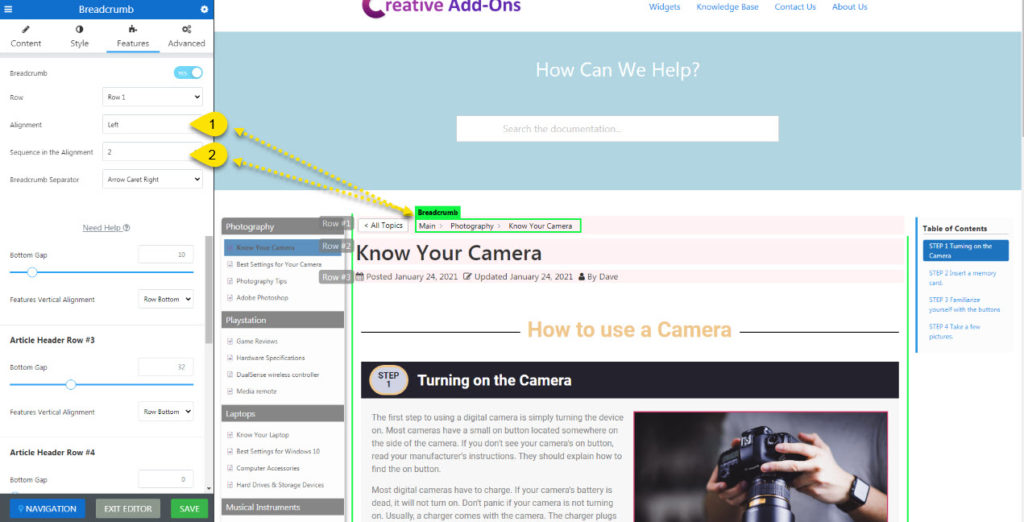
Option 4 Align Feature Horizontally
- Alignment:
- Left Alignment: This moves the feature to the left side, as it is now in the image example.
- Right Alignment: This moves the feature to the right side.
- Sequence in the Alignment: This determines the sequence of all features assigned to the left or to the right side. For example, since this feature is set to value 2 and the Back Navigation is set to 1, you will see the Back Navigation first then the Breadcrumbs.
-
- Left Aligned features:
- 1 First on the left
- 2 Second on the left
- etc.
- Right Aligned features:
- 1 First on the right
- 2 Second on the right
- etc.
- Left Aligned features:
Option 5 Example of Feature Right Alignment
The example below show the approximate location on the right side of the article content.
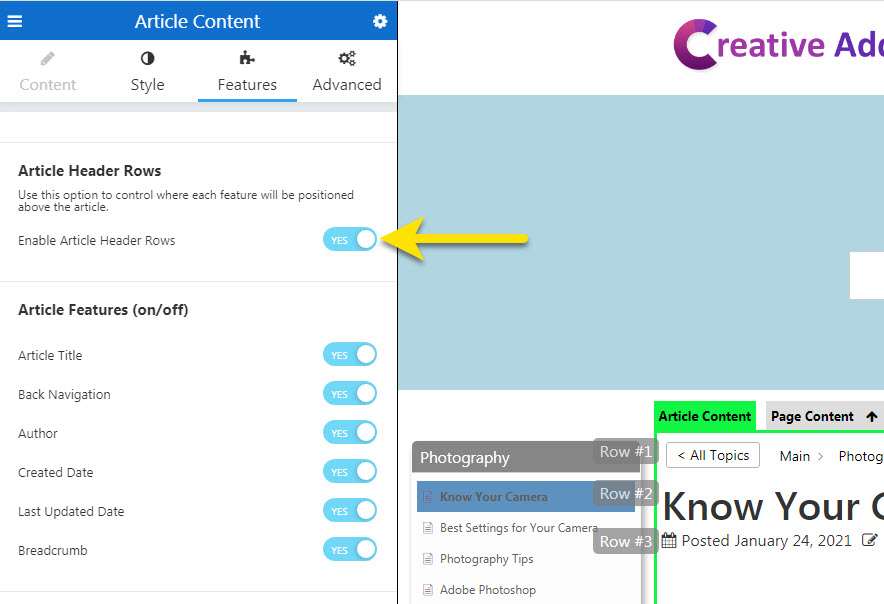
Enable Article Header Rows (Old KB Versions Only)
If you are upgrading from a previous KB plugin version, enable the following setting so that you can control the features above the article in more advanced ways.
This article's heading and steps are built with our Creative Addons plugin.
0 out Of 5 Stars
| 5 Stars | 0% | |
| 4 Stars | 0% | |
| 3 Stars | 0% | |
| 2 Stars | 0% | |
| 1 Stars | 0% |