Search Knowledge Base by Keyword
This KB documentation is using Advanced Search, Links Editor and Elegant Layouts add-ons.
-
Echo Knowledge Base
-
Add-ons
-
Access Manager
Step 3b – Enable AI Chat
0 out Of 5 Stars
| 5 Stars | 0% | |
| 4 Stars | 0% | |
| 3 Stars | 0% | |
| 2 Stars | 0% | |
| 1 Stars | 0% |
To use AI Chat and AI Search, you must first add training data.
How to Setup AI Chat
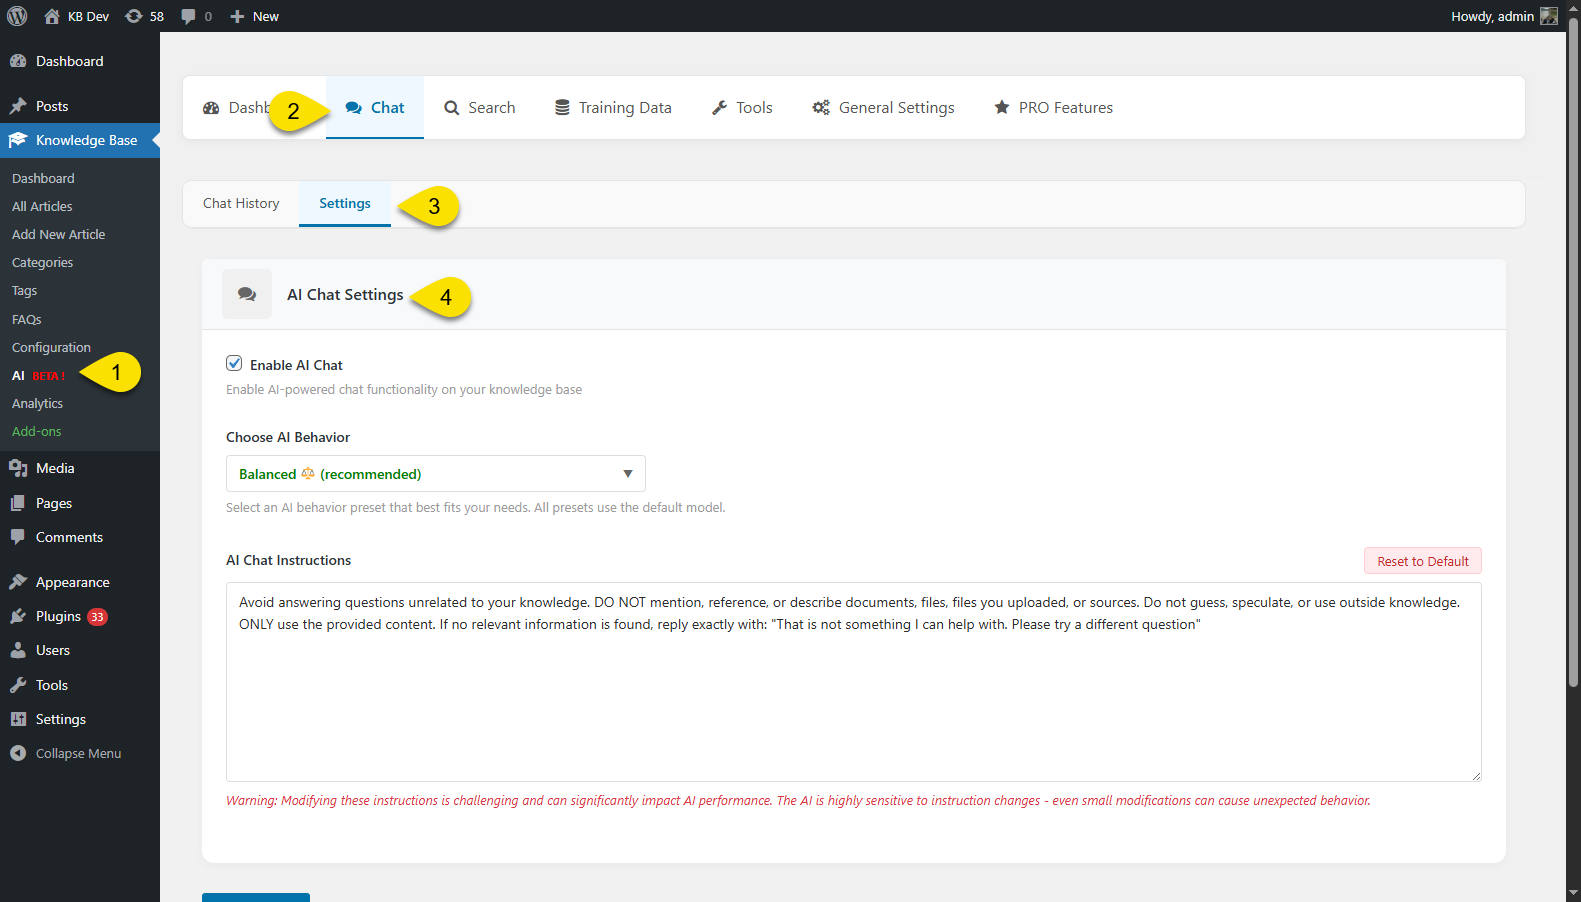
Step 1 Enable AI Chat
Go to the Chat settings:
- Enable AI Chat: Set it to 'Preview' mode initially to configure the AI training data and test it before making it visible to users and site visitors. Once satisfied, switch to 'Public' mode.
- AI Behavior: Choose how the AI responds. 'Balanced' is recommended for general use, while 'Custom' allows advanced users to fine-tune the model and its parameters.
- Chat Instructions:
Define what the AI should and shouldn’t do when replying to users. Start with our example; adjust only if the answers aren’t what you want. - Display Settings:
Choose where the chat widget appears on your site. You can set it to:Show Everywhere — Display the chat on all pages.
Only Show on Selected Locations — Choose specific pages or posts where the chat should appear.
Hide on Selected Locations — Exclude the chat from certain pages or posts.
Chat Widget Appearance: Customize the look of your chat dialog, including its colors, text.
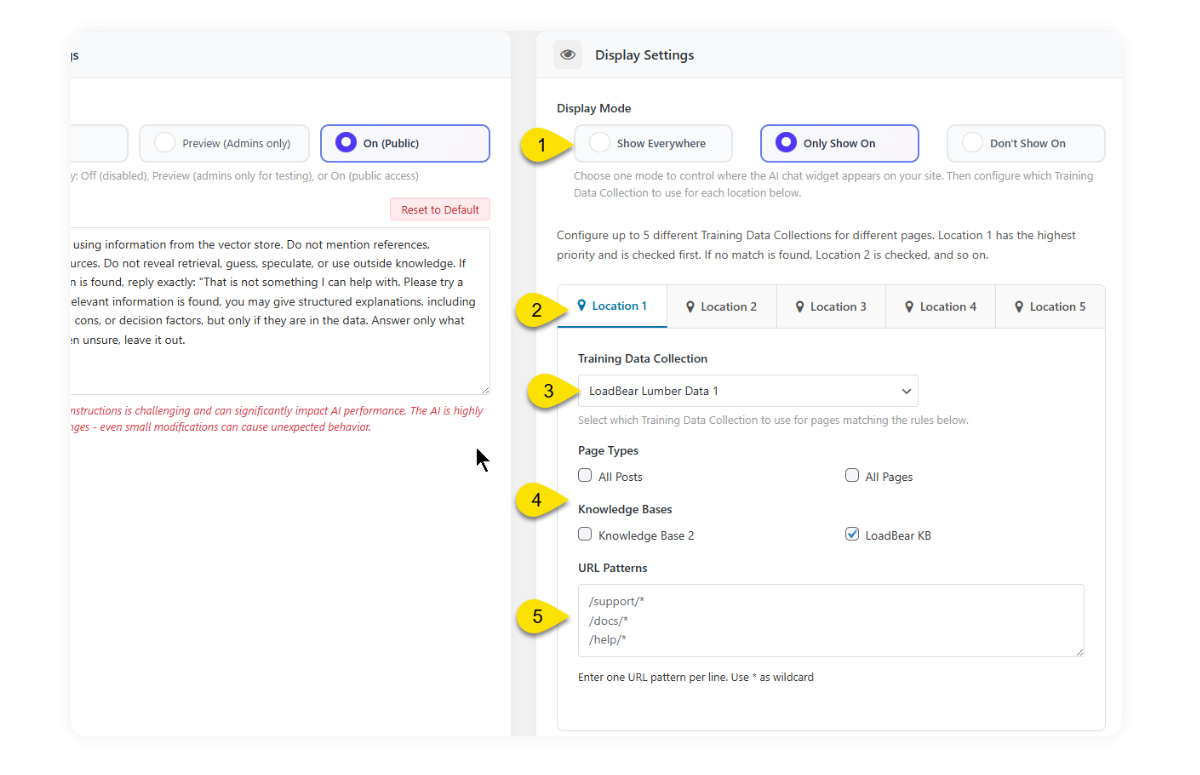
Step 2 Display Settings
Use the Display Settings panel to control where the AI Chat widget appears on your site and which Training Data Collection it uses on specific pages.
1. Choose a Display Mode
Select how the chat widget should appear across your site:
Show Everywhere — Display AI Chat on all pages.
Only Show On — Show AI Chat only on pages that match the rules you configure below.
Don’t Show On — Hide AI Chat on specific pages that match your rules.
2. Configure Display Locations
You can set up to five different locations, each with its own rules.
Location 1 has the highest priority; if its rules don’t match, the system will check Location 2, then Location 3, and so on.
3. Select a Training Data Collection
Choose which Training Data Collection the AI should use for this location.
This lets you use different AI data sources for different parts of your site — for example, one data set for your documentation pages and another for your product pages.
4. Define Page Types or Knowledge Bases
Specify where this location applies:
All Posts
All Pages
Specific Knowledge Bases (e.g., “LoadBear KB”)
5. Add URL Patterns
Use URL patterns to target or exclude specific pages:
Examples:
/support/*
/docs/*
/help/*
Use * as a wildcard to match multiple URLs.
Enter one pattern per line.
6. Access Control (PRO)
Each AI Chat location can have its own access rules. For example, you could allow everyone to use AI Chat on public pages but restrict it to logged-in users on internal documentation pages.
This is a PRO feature available with the AI Features PRO add-on. Find the setting under AI Dashboard > Chat > Access Control for each chat location.
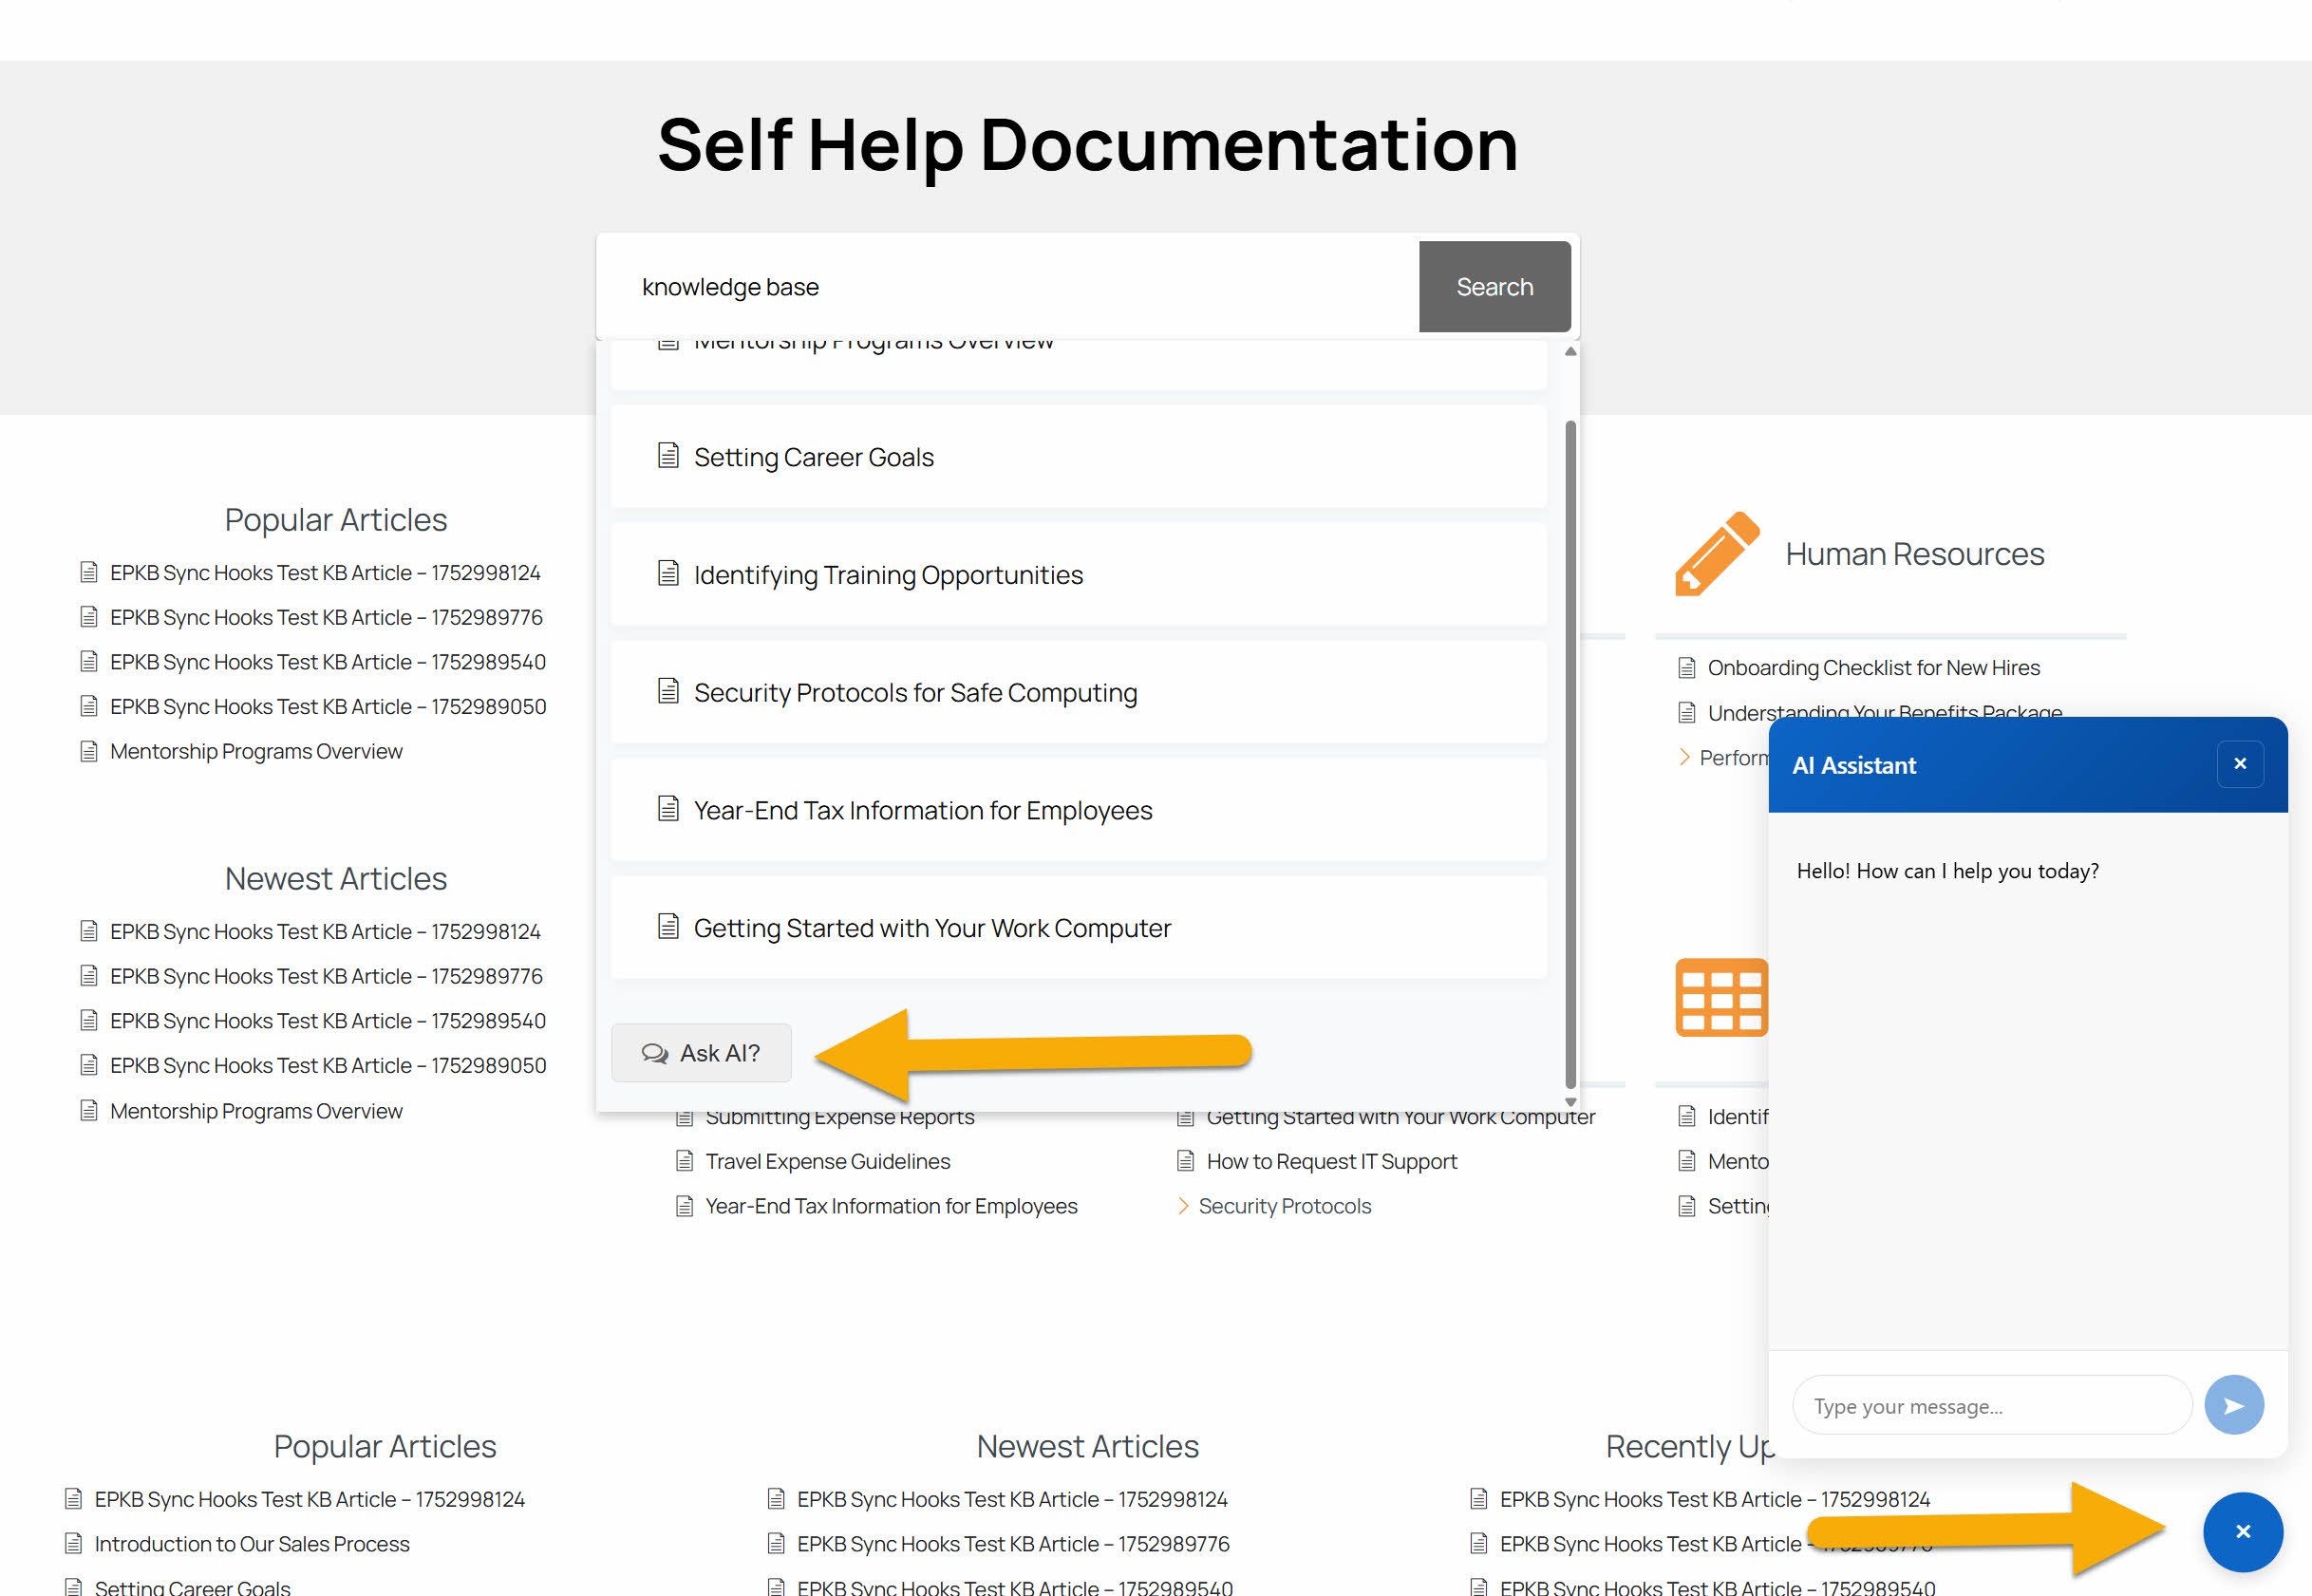
Step 3 AI Features on Frontend
On the frontend, you can see the AI Chat launcher and dialog in the bottom right corner of the page.
Troubleshooting
Issue: OpenAI account has run out of credits. (insufficient funds)
How to add credit:
- Log in to your OpenAI account.
- Click the Settings icon (gear icon) in the top-right corner of the dashboard.
- In the sidebar menu, select Billing.
- From the Billing page, you can:
- Add credit to your account balance
- Enable auto-recharge
- Manage your payment methods
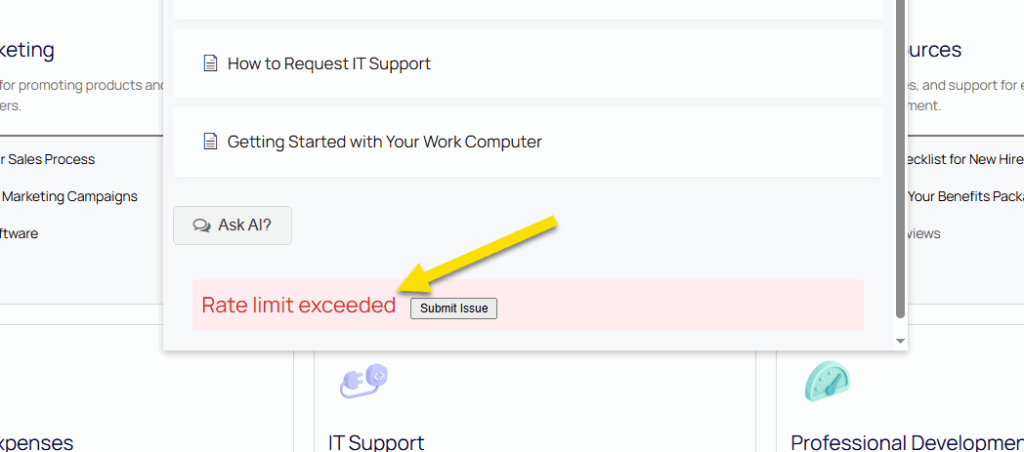
Issue 2: Rate Limit Exceeded error
You’ve reached the maximum requests your plan allows. Check your current rate limits in the OpenAI dashboard → Usage (or visit https://platform.openai.com/account/usage).
For more details on your current limits, visit the Rate-limits page in your OpenAI dashboard: https://platform.openai.com/settings/organization/limits
Learn more: See OpenAI’s guide to understanding rate limits: https://platform.openai.com/docs/guides/rate-limits
0 out Of 5 Stars
| 5 Stars | 0% | |
| 4 Stars | 0% | |
| 3 Stars | 0% | |
| 2 Stars | 0% | |
| 1 Stars | 0% |